# Publish via SRT
SRT (Secure Reliable Transport)는 Network 품질을 예측하기 어려운 환경에서도 Live Stream을 안정적으로 전송할 수 있도록 설계된 Protocol입니다. Packet loss나 Jitter가 발생하는 구간에서도 비교적 견고한 송출 품질을 기대할 수 있어, 현장 중계나 장거리 전송처럼 네트워크 변수가 큰 상황에서 특히 유용합니다.
사용자는 `SRT`로 Stream을 OvenMediaEngine Enteprise on AWS로 Publish할 수 있습니다. **Live 전송 시 Stream은 MPEG-2 TS 컨테이너로 수신**되며, 이 방식은 `RTMP`와 달리 다양한 Codec을 유연하게 수용하는 데 유리합니다. 또한, 필요에 따라 Simulcast 구성도 활용할 수 있습니다.
본 Guide에서는 SRT 기반 송출 절차와 송출 이후 기본 검증 방법을 순서대로 안내합니다.
Item
Supported
Container
MPEG-2 TS
Transport
SRT
Codec
H.264, H.265, AAC
## SRT Publish 시작하기
본 예제에서는 가장 보편적으로 사용되는 Live Encoder Software인 OBS Studio를 사용했습니다.
{% stepper %}
{% step %}
### Live Encoder로 송출 (OBS Studio)
1. Open Broadcaster Software (OBS) Studio를 실행합니다.
* OBS Studio가 설치되어 있지 않다면, 공식 링크 ()에서 다운로드하여설치하십시오.
2. 송출할 Media Source (또는 Camera, Screen Capture 등)를 추가합니다.
3. 이후 OBS 우측 하단의 \[Settings]를 클릭합니다.
{% endstep %}
{% step %}
### OBS에서 스트리밍 설정
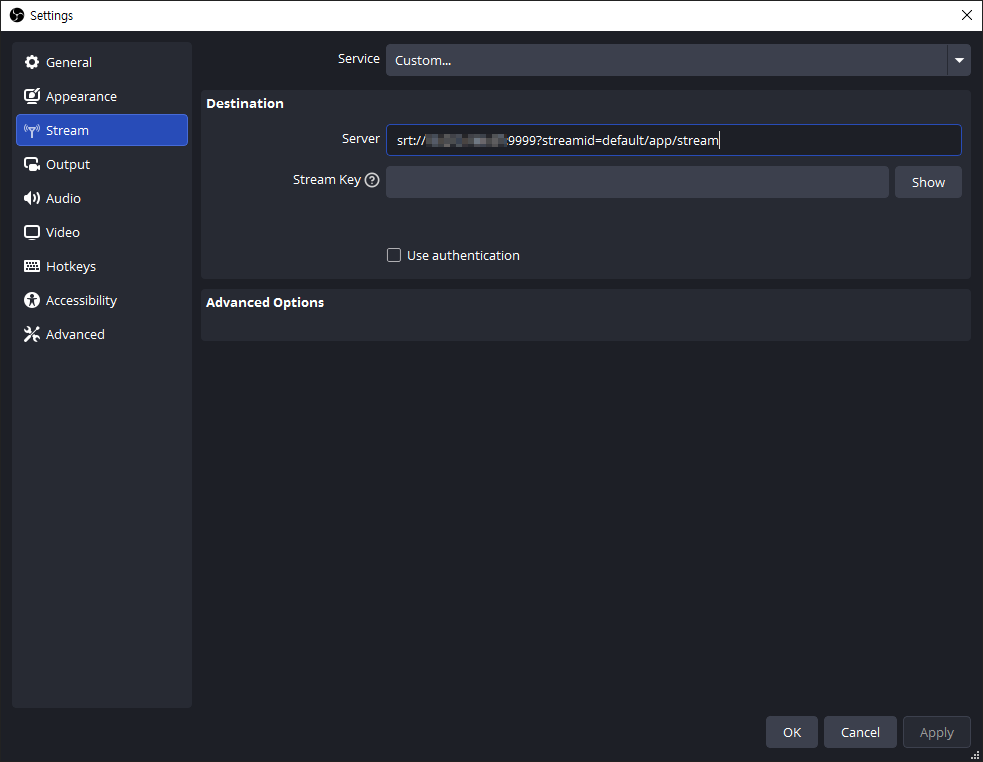
4. Settings 화면 좌측에서, \[Stream] 탭을 선택합니다.
5. 그리고 \[Service]에서 **\[Custom]**을 선택한 뒤, Server 입력란에 SRT Ingress URL을 입력합니다.
* SRT URL 형식: **`srt://`**`{Public IPv4 or Domain}:`**`9999?streamid=`**`{host}/{app}/{stream}`
{% hint style="info" %}
SRT Input 패턴을 모르는 경우, Web Conosle에서 \[Managed Stream]을 만든 후 \[URLs] 탭에서 확인할 수 있습니다.
{% endhint %}
6. 이후 \[Output] 탭에서 원활한 초저지연 및 저지연 스트리밍을 위해 **`Keyframe Interval`**을 **1초**로, **`B-frames`**를 **0**으로 설정할 것을 권장합니다.
{% hint style="success" %} B-frames를 0으로 설정 (`bframes=0`)하는 이유는 `WebRTC` 최종 출력 시 끊김 현상을 방지하기 위함입니다.\
위 예시는 Encoder로 `x264`를 선택했을 때의 설정 화면이며, 다른 Encoder를 선택할 경우 표시되는 항목이나 세부 구성은 달라질 수 있습니다. `WebRTC`를 최종 출력으로 사용하는 경우, B-frames는 0으로 설정하는 것을 권장합니다.
{% endhint %}
7. 필요에 따라 \[Audio], \[Video] 등 각 탭에서 세부 설정을 조정한 뒤, \[OK]를 클릭하여 OBS 메인 화면으로 돌아갑니다.
8. 모든 설정이 완료되었다면, \[Start Streaming]을 클릭하여 송출을 시작합니다.
{% endstep %}
{% step %}
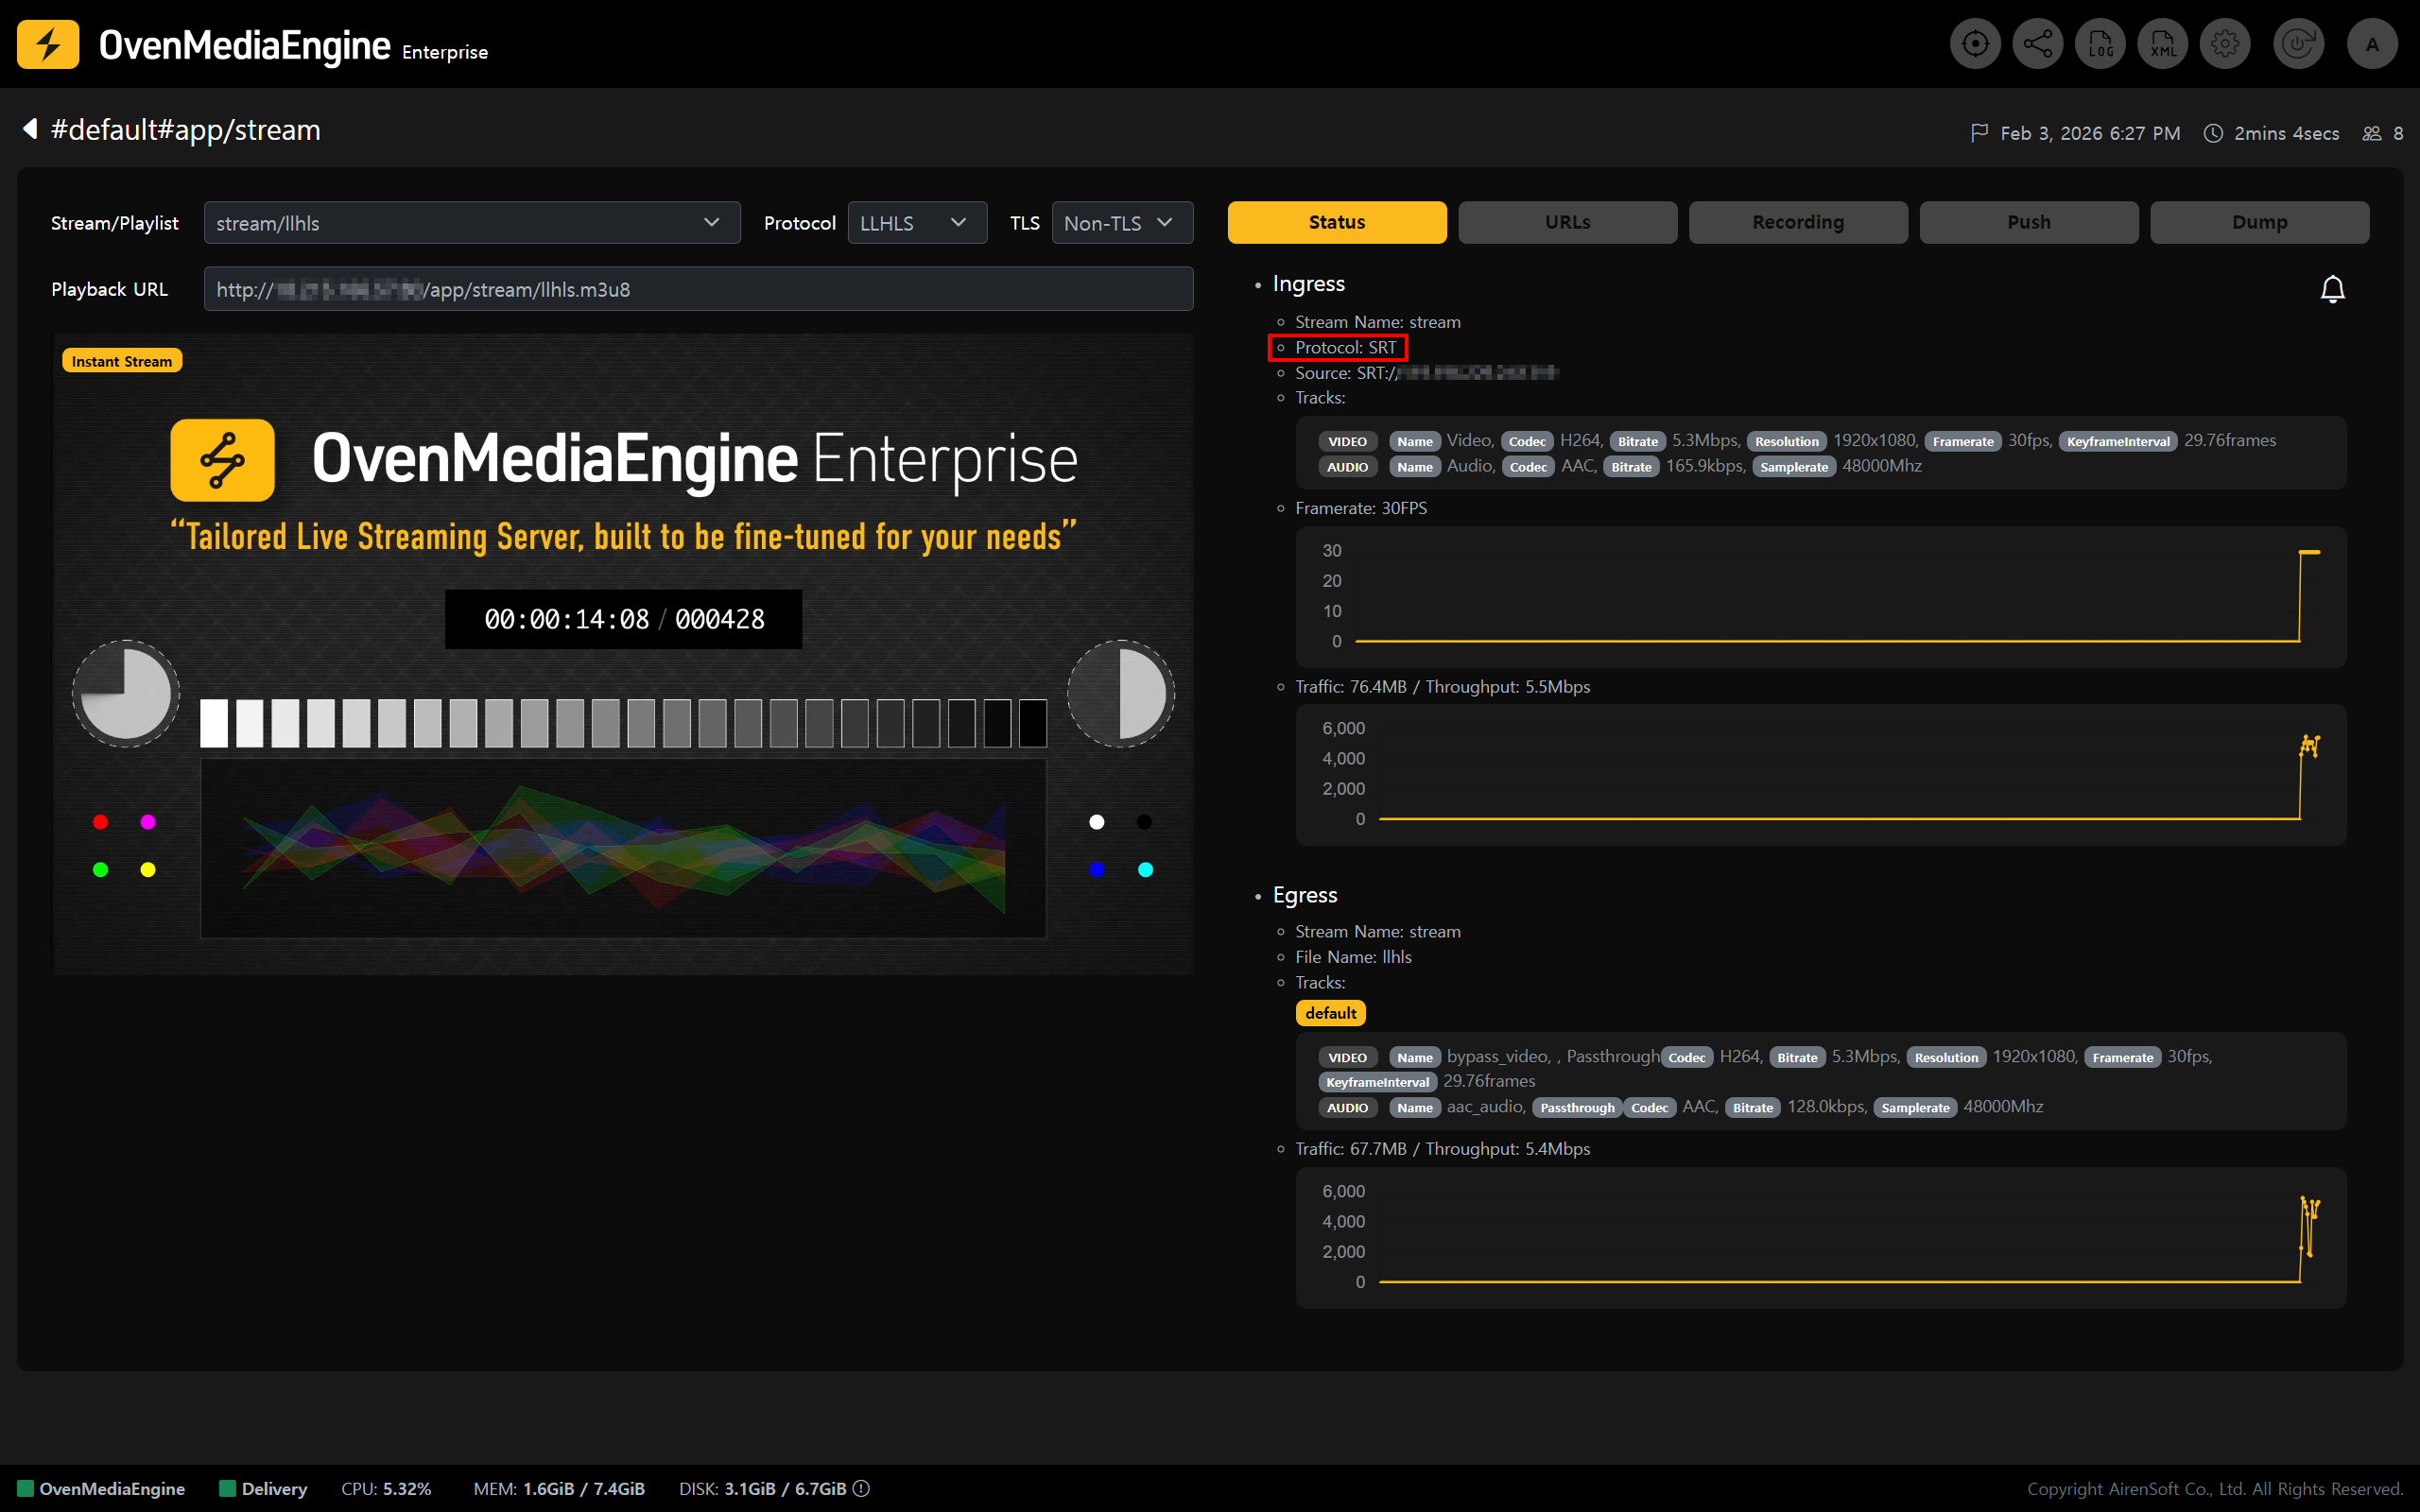
### Web Console에서 스트림 상태 및 재생 확인
9. Web Console에 OBS에서 송출한 Stream이 목록에 표시되는지 확인합니다.
{% endstep %}
{% endstepper %}